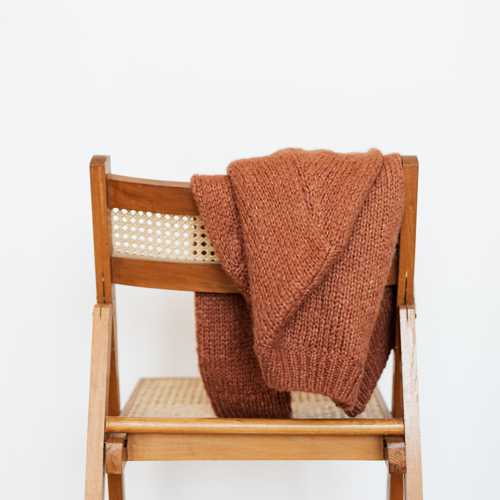
How to Block Knitting

Most knitting patterns end with the instruction to block your finished object - but what does that mean? In this guide, we demystify blocking knitwear. We explain what it does, why it's important, and how to do it - giving you great result with your knitting, every single time.
Contents
What is blocking in knitting?
Why block knitting? Almost every knitter has experienced this: you know you've followed the pattern exactly as written - but why does your finished object look so ugly and uneven, and nothing like the photos online? This is where blocking comes in. Blocking allows you to shape your handknits to your liking. The most common way of doing this is by getting your finished object wet, shaping it as you wish, then leaving it in place to dry.
Blocking is one of the last stages of any knitting project. If you are making a seamless piece - for example, a shawl, scarf, pair of socks, or a jumper knit in the round - you'll block once you've finished knitting. If you're making a seamed piece, such as a jumper or cardigan knit flat in pieces, you should block before you sew the seams together. This ensures you'll have even seams, and a piece that fits as it should.
Some fibres change their character significantly when blocked. For example, alpaca yarn can grow tremendously after blocking, so your garment will be much bigger than it appeared on the needles. To keep this under control, be sure to block your gauge swatch when you start knitting. This will let you see clearly how your knitting will turn out once blocked.
Common blocking techniques
Wet blocking
Wet blocking is the most common type of blocking, and is typically used for wool and many other animal fibres, as well as some synthetics like acrylic. However, it can be too powerful for some delicate fibres, which require a gentler method of blocking.
Wet blocking knitwear consists of getting it thoroughly wet, then using a towel to remove as much moisture as possible before stretching it into the desired shape. Use blocking pins and leave it to dry. In the first step, you'll submerge your knitting in water. Add some wool wash to the basin for the best results - this is great for both gently washing your piece and adding a subtle fragrance.
Spray blocking
Spray blocking knitting is the best technique for delicate fibres, such as silk, cashmere, mohair, or alpaca. These fibres all become very weak when wet, so can be damaged by wet blocking. Some of them, such as mohair and alpaca, also have a distinctive halo, which is best preserved by spray blocking.
Lay your finished piece on a flat service. Use a set of blocking pins to pin it out to the desired dimensions, then spritz the piece gently with a spray bottle of water. When it is damp - not completely wet - leave it to dry in its new shape.
Steam blocking
The steam blocking technique is good for cotton, which weakens when wet and easily stretches out of shape. You can also use it when you are trying to finesse the final details of your knitted project. For example, steaming can be effective when you are trying to stop the edges of stockinette stitch from curling. It will encourage the knitting to lie flat - although it can take quite some time to get results.
When steam knitting, you'll pin your piece into the desired shape, then cover it with a piece of clean fabric. Press it gently with a hot steam iron. It's important that you don't press it as hard as you would if you were actually ironing your clothes. Steam blocking is a slow process, and is very hands-on, but it can be very effective.
How to block knitting
This guide can be used to wet block knitwear such as jumpers, cardigans, scarves, shawls, and so on. Blocking socks and hats is a little different, so we'll discuss that process below.
To start, you will need:
- A basin or sink
- A towel
- Wool wash
- Blocking pins
- Blocking wires (not essential but nice, especially for lace)
- A ruler or tape measure
- A flat surface that you can stick pins into, such as a knitting blocking board
Blocking kits are a good idea, as they contain the essentials you need to get going.
First, fill your basin with warm - never hot! - water and a bit of wool wash. Do not run the tap directly onto your knitwear, as it can weaken and break the fibres. Add your knitted piece to the warm water and leave it to soak. Make sure it is completely wet, but do not agitate it too much. This can cause felting.
Let your knitwear soak for 10 - 30 minutes. Lift it out very carefully, using both hands. Squeeze the excess water out gently - do not wring it aggressively. Then lay the item flat onto a dry towel and roll it up. Press down firmly on the rolled-up towel. Your objective is to get out as much excess moisture as possible.
Lay your item on your flat surface, and use blocking wires and pins to shape it. You may want to take a look at the pattern's schematic to check dimensions. Use a ruler or tape measure to ensure accuracy. Blocking wires will help you block more firmly, and are useful if you have a lace design. They are not always necessary, though. You might be able to get your piece to the desired shape using just your hands. Be gentle - don't tug aggressively, or you might ruin all your hard work!
Leave your knitting to dry completely, then remove the pins and wires and admire your work.
Blocking socks
Socks should be wet-blocked, as they are usually made from wool or merino. Follow the steps above, but instead of using pins and wires, use a pair of sock blockers. These allow you to easily block your socks to fit feet. Adjustable sock blockers mean you can choose the desired length.
Unlike other types of blocking, sock blockers can be hung up. Hang them in a warm area with good air flow. This will help them dry faster.
Blocking hats
Want your knitted hat to fit perfectly? Follow the wet blocking techniques, but rather than using pins and wires, use a round object. If you have a bowl or ball approximately the size of your head, they will work well. You could also try inflating a balloon to the right size. Pull your damp hat carefully onto the round object, gently move it into shape, and leave it to dry.
For really good results, use your own head! Put a thin towel over your head, and wear the slightly-damp hat over that for a few minutes. Remove it carefully, so it holds its shape, and leave it to dry. It might feel strange, but it'll help you get a hat that fits like a glove.
Summary
Blocking might seem complicated or confusing, but by following our step-by-step guide you should have the confidence to block your knitting without worry. With the right blocking tools and some patience, you can achieve amazing results and take your knitting to the next level!
Also in Yarn Guides


What is boucle yarn?
Boucle yarn is a popular material for knitting that creates a unique textured fabric. Learn everything you need to know about boucle with our in depth guide!


How to crochet a magic circle
What is a magic ring in crochet? This technique has taken the crafting world by storm. If you've ever tried crocheting in the round, you might have found that a little hole forms at the start of your project. This can be frustrating and hard to cover up. The magic ring solves that.
Read More


Crochet Tools and Accessories Guide
One of the most exciting parts of taking up a new hobby is discovering all the fun tools involved! In this guide to crochet accessories you'll learn about what you need to make everything from basic granny squares to adorable amigurumi.
Read More